
Author: Rafael Cury Cecato, Thiago Roberto Gemeli, Carlos Landmeier, and Ricardo de Souza Magini
Introduction
Cemented prostheses provide esthetics allied to mechanical retention security; however, although the literature demonstrates that the technique is effective if well conducted 1-4, there is no consensus on advantages or disadvantages relative to screwed prostheses 5,6, with doubts remaining about the extravasation and permanence of the cement in the tissues and its role in the development of peri-implant diseases.
In the case presented, a single-tooth prosthetic restoration is manufactured with an unprecedented technique in which the crown is stabilized by friction over the prosthetic component (the same used for cemented restorations), without risk of adversities originated by excess cement, maintaining its occlusal anatomy and without the considerable access to the prosthetic screw, mandatory for screwed prostheses.
CASE REPORT
Patient with leukoderma, male, 57 years, sought the clinic to rehabilitate the right upper posterior region. After anamnesis and a clinical examination, complementary tests were requested, such as tomographic imaging and blood tests (hemogram, coagulogram, and glycemia).
It was determined that teeth 16 and 17 had been lost. Tooth 18 presented itself mesialized and with a suspicion of a periapical endodontic lesion (periapical bone rarefaction identified in radiographic images), yet without periodontal disease and with sufficient natural structure for its maintenance. The tomographic images also determined sufficient bone volume for anchoring dental implants in the area (Figs. 01 and 02).
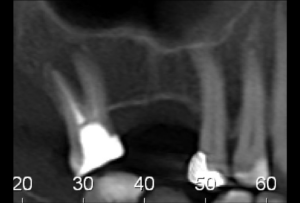
Fig. 01
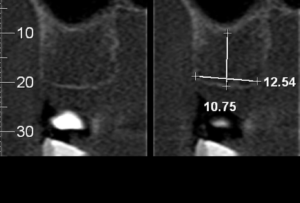
Fig. 02
In common agreement with the patient, it was decided to keep tooth 18, provided it was submitted to endodontic assessment/treatment and its distal coronal portion was adjusted to eliminate occlusal interference during protrusive movement.
The prosthetic space was then planned to be composed of a single crown, given that its mesial-distal distance would be compatible with an upper molar.
A dental implant was then installed in the area – Arcsys 4.3 mm x 9 mm (FGM Dental Group, Brazil) – with final stability of 40 Ncm. A multifunctional healing cap (5 mm – high brace) was installed over the implant at the same time (Figs. 03 and 04).
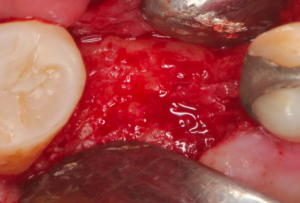
Fig. 03
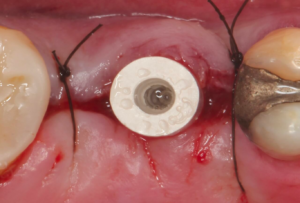
Fig. 04
After about 30 days, a prosthetic component for cemented prosthesis – Arcsys abutment with 4.2 mm x 6 mm of prosthetic portion and 4.5 mm of transmucosal portion – was selected, angled with 07 degrees, and activated. An immediate provisional crown was made to promote function and initiate the peri-implant tissue conditioning (Fig. 05).
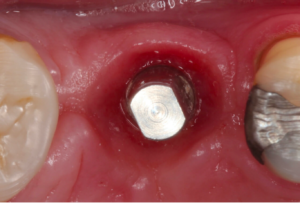
Fig. 05
After the tissue conditioning, the multifunctional transfer coping compatible with the abutment was adapted and personalized with photopolymerizable acrylic resin in gel to promote copy fidelity in the conditioned tissue contour (Figs. 06 and 07).
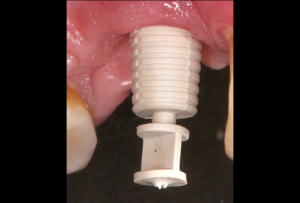
Fig. 06
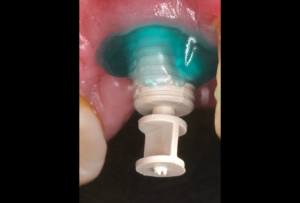
Fig. 07
As made explicit above, with the purpose of combining mechanical stability, esthetics, and biological security, a Frictional Coping (FGM Dental Group, Brazil) for the 4.2 mm x 6 mm abutment was acquired and delivered to the laboratory technician. With the aid of the intraoral and extraoral Scan Body compatible with the prosthetic component, the work model was digitized (Fig. 08). As per the digital library (Arcsys – FGM) present in the modeling software (Exocad GmbH, Germany), the zirconia infrastructure was produced, and the coating ceramics was applied over it (Figs. 09 to 12). Following the technique proposed by the manufacturer 7, the Frictional Coping was then activated on the model (with the hammer and the indicated PEEK tip), and the crown was cemented over it (Figs. 13 to 20). After removing the excess cement, finishing, and polishing, the part was fit to be activated in the patient (Figs. 21 and 22).
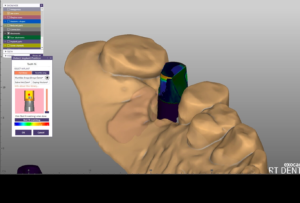
Fig. 08
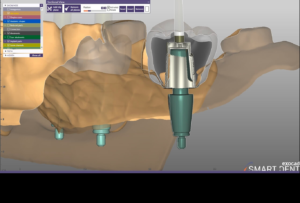
Fig. 09
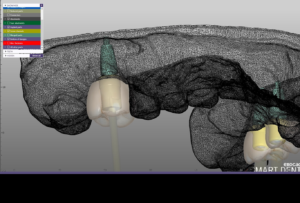
Fig. 10
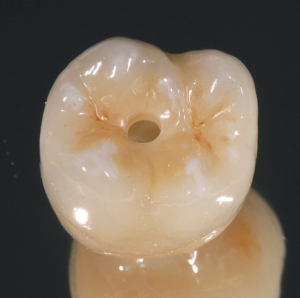
Fig. 11
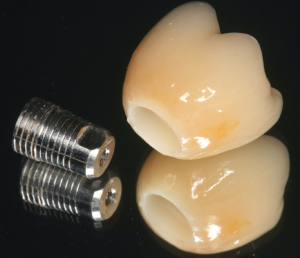
Fig. 12
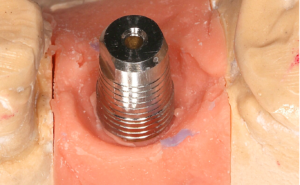
Fig. 13
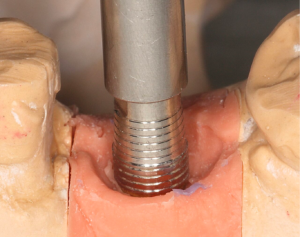
Fig. 14
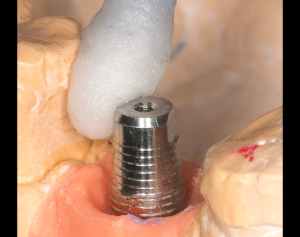
Fig. 15

Fig. 16

Fig. 17
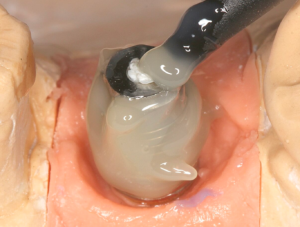
Fig. 18
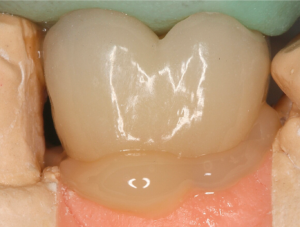
Fig. 19
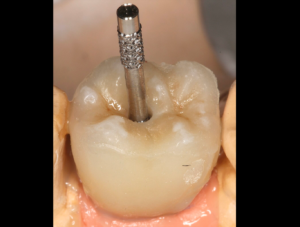
Fig. 20
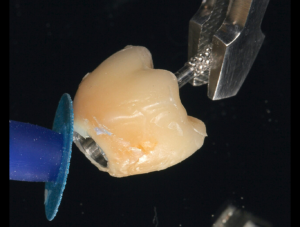
Fig. 21
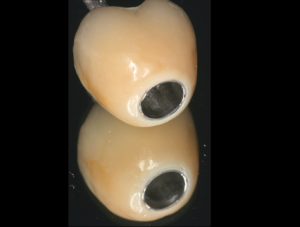
Fig. 22
After removing the provisional crown, the crown with the Frictional Coping is positioned over the abutment, proximal adjustments are made if necessary, and then it is activated with the Abutment Placement Tool and its PEEK tip (Figs. 23 and 24). If it needs to be removed for any reason, one has to adapt the Frictional Coping Extractor Tool and activate it again, whenever necessary. The minimal opening for the access of this tool was then filled with Teflon tape and covered with composite (Vittra APS Unique).
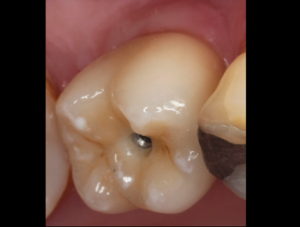
Fig. 23
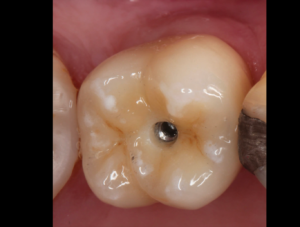
Fig. 24
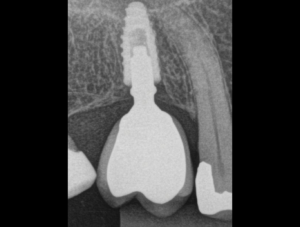
The treatment follow-up (03 years) (Fig. 25)


