
Anatomized fiberglass posts: Step-by-step clinical routine
Authors: Dr. Raphael Monte Alto, Dr. Helena Klemba, Dr. Ariane Vaz Storrer, Dr. Francieli Suntak, Dr. Luany Halaiko, Jucimara Klemba and DP Miguel Abrão
INITIAL EVALUATION
After anamnesis, clinical and radiographic exams, the professionals noted the presence of a temporarily cemented total crown in acrylic composite. The endodontic treatment was adequate without painful symptoms neither periapical alteration.
After the removal of the crown, due to the presence of little coronary remainder, the reconstruction was planned based on an anatomic fiberglass post and a future total crown in pure ceramic.
TREATMENT PERFORMED
The removal of the restoration in composite was done and the coronary remainder was evaluated. After odontometrics, using a number 2 Gates-Glidden drill, the gutta-percha was removed keeping 5mm in the apical region. With a prophylactic intra-canal brush, the cleaning of the canal was made for the removal of the remaining gutta-percha and endodontic cement. After cleaning, the DC 1 Whitepost System post was tried out. The choice for a post with a diameter narrower than the canal has as its purpose the anatomization of the post with composite. That procedure, besides allowing for a better frictional retention with the canal, allows for the positioning of the post in a very centralized manner in relation to the abutment in composite.
To prevent the composite from being retained in the canal, the canal was isolated with a water-based gel. The post was cleaned with gauze and alcohol and an adhesive was applied on its surface. With the dentin composite Vittra APS DA2 a cone was modeled, over the apical area of the fiberglass post, with dimensions compatible to the canal. The assembly was taken slowly so that the composite would copy the shape of the canal. After the total insertion of the post in its odontometrics, the cervical composite was slightly condensed for the perfect adaptation in the cervical area. With a photoactivating equipment, a 5-second photoactivation was carried out, the post was removed 2mm and then returned to the previous position followed by another light activation for 5 seconds. That procedure is done until the post comes out completely polymerized.
Before the total removal of the post, a mark is made for the identification of the vestibular face. With the post and composite outside the mouth, a complementary polymerization is carried out. The canal was washed, the post was reinserted and the coronary portion was filled with the same composite.
With the assembly in position, the preparation for the total crown is done and right away, the assembly is removed with hemostatic pliers. For the final cementation, the canal was washed with abundant water and dried with paper cones and the post was cleaned with gauze and alcohol. The Ambar Universal APS adhesive was applied inside the canal and the Allcem Core cement was used for the final cementation. After the removal of the isolation, the preparation was finished and a molding was done. The mold was sent to the laboratory Singulares (TPD Miguel Abrão) where a disilicate crown was fabricated. The crown was cemented with Allcem Veneer APS and Ambar Universal APS.
STEP-BY-STEP
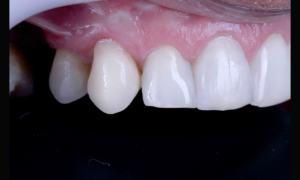
Fig. 1 Initial case – Temporary crown in acrylic composite.
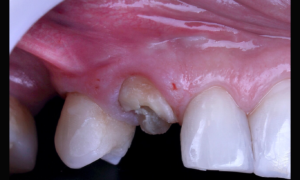
Figs. 2 and 3 Vestibular view of the coronary remainder.
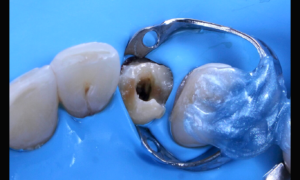
Fig. 4 Absolute isolation made.

Fig. 5 Removal of the gutta-percha with Gates-Glidden drill keeping 5mm in the apical region.
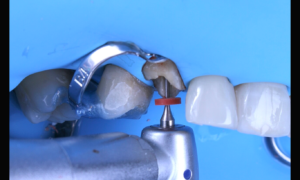
Fig. 6 Removal of the gutta-percha with Gates-Glidden drill, keeping 5mm in the apical region.

Fig. 7 Cleaning the canal with an intracanal brush.

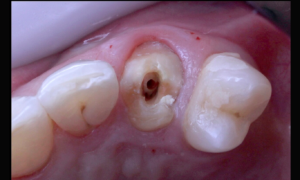
Fig. 8 Canal ready to receive the post.
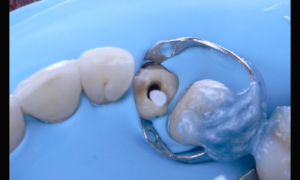
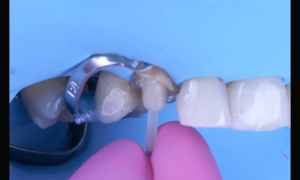
Fig. 9 Fitting of the post 1. In this photo it is possible to note the failure in the fitting of the WhitePost DC post.

Fig. 10 That space allows for the post to be positioned adequately in the nucleus by means of relining with composite.

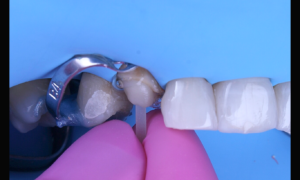
Fig. 11 Post positioned in the center of the future coronary nucleus
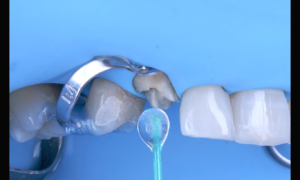
Fig. 12 Isolation of the canal with water-based gel.
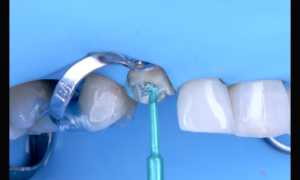
Fig. 13 Isolation of the canal with water-based gel.
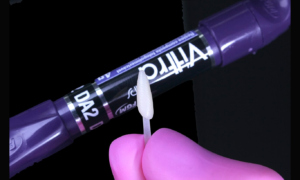
Fig. 14 After the application of the adhesive and photopolymerization for 20 seconds. A composite cone is made.
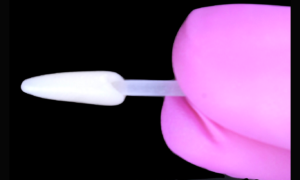
Fig. 15 Note the shape compatible with the canal.
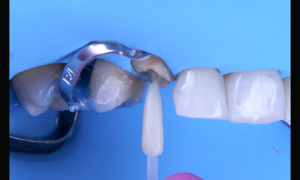
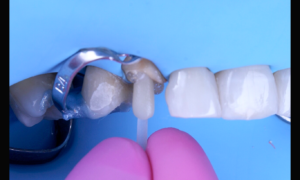
Figs. 16 to 19 Insertion of the assembly in the canal.
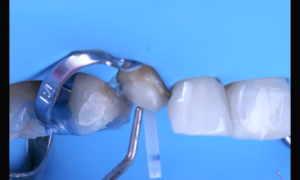
Fig. 20 Cervical condensation of the composite.
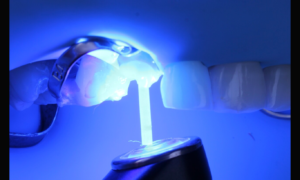
Fig. 21 Photopolymerization for 5 seconds.
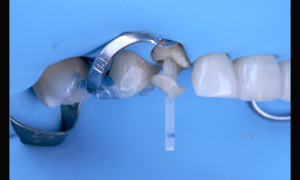
Fig. 22 Marking of the vestibular face of the post and removal of the molded post.
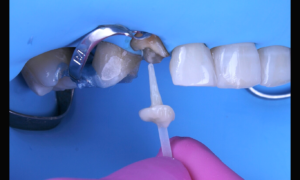
Fig. 23 Marking of the vestibular face of the post and removal of the molded post.
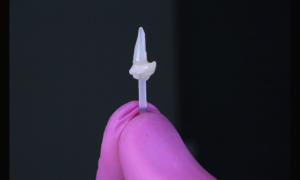
Fig. 24 Molded post. At this moment, if there is any retention, it can be removed with sandpaper.
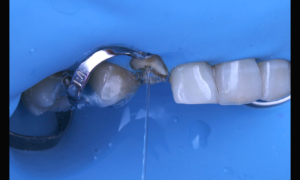
Fig. 25 Washing of the canal.
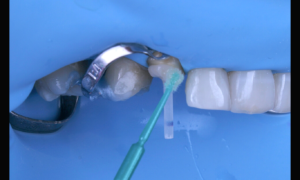
Fig. 26 Reinsertion of the post and application of the adhesive in the coronal portion
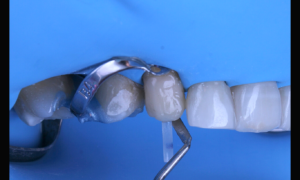
Fig. 27 Filling with composite.
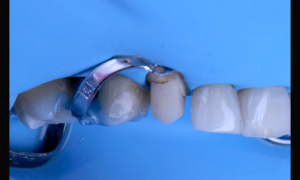
Fig. 28 The preparation of the total crown is concluded.
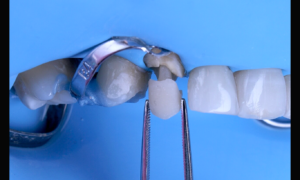
Fig. 29 Removal of the molded post.
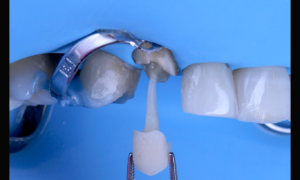
Fig. 30 Removal of the molded post modelado.
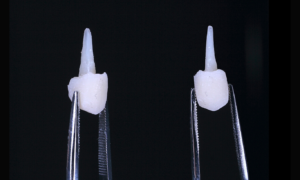
Fig. 31 Anatomic post ready.
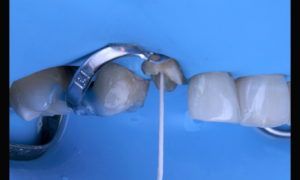
Fig. 32 Washing and drying of the canal with paper cones.
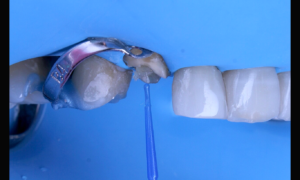
Fig. 33 Application of the Ambar APS Universal adhesive.
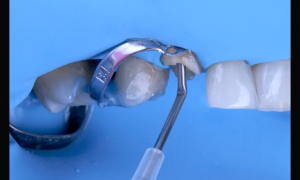
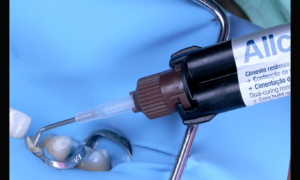
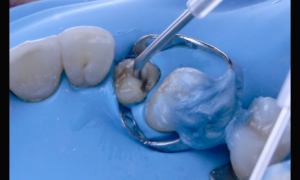
Fig. 34 to 36 Filling with Dual Allcem Core cement.
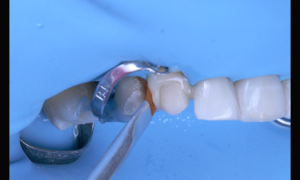
Fig. 37 After post placement, excess cement is removed with a brush.
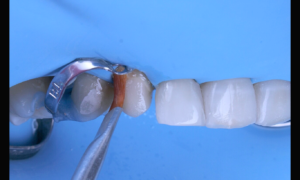
Fig. 38 After post placement, excess cement is removed with a brush.
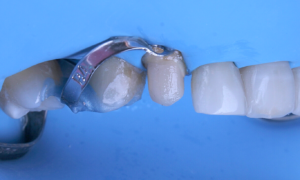
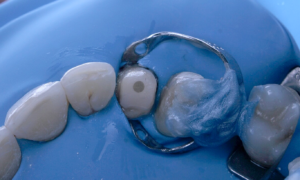
Fig. 39 and 40 Cemented post.

Fig. 41 Preparation concluded after the removal of rubber dam isolation.
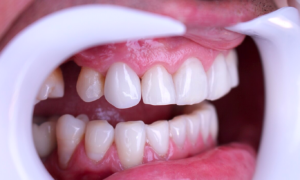
Fig. 42 Final cementation.
Articles similaires

Carlos Eduardo Francci, Alexander Cassandri Nishida, Ezequias Costa Rodrigues Júnior, Camila Rivoli Kiyohara, Pedro Paulo Albuquerque…

WAY BEYOND A COLORLESS ADHESIVE SYSTEM Does the color of the adhesive interfere, in a relevant…

Authors: Dr. Andréia Luiza Gabriel Dr. Rodrigo Reis Adhesive systems have revolutionized esthetic dentistry, allowing for…

Dentistry is in constant evolution. Besides caring for oral health, the world has been seeing tools…

Dr Fabio Lorenzoni The patient came to the dental office, reporting the frequent falling out of…

Authors: Dr. Jéferson Fagundes Patient gender and age: Female patient, 67 y.o. Chief complaint: Absence of tooth 12…